| Table of Contents | ||
|---|---|---|
|
Using PuTTYGen (Windows)
PuTTYGen can be installed separately or together with WinSCP (Free Windows SFTP/SCP client)
| Info |
|---|
It can be downloaded from : As part of WinSCP - downloaded from https://winscp.net/ or PuTTYGen(alone) - download from https://www.puttygen.com/ |
After downloading the package, run it. Select “Full Installation” and choose your desired language. Be sure that the boxes concerning the installation of “PuTTYGen” and “Pageant” are checked.
If you chose WinSCP, select your desired language and then select “Typical Installation”, which includes PuTTYgen and Pageant. Follow the installation instructions.
| Info |
|---|
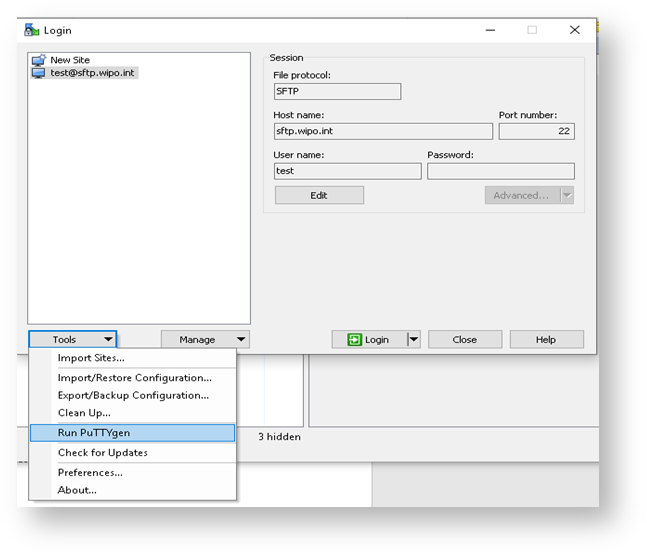
For WINSCP WinSCP, after installation finishes, you can find PuTTYGen in the menu:
|

...
|
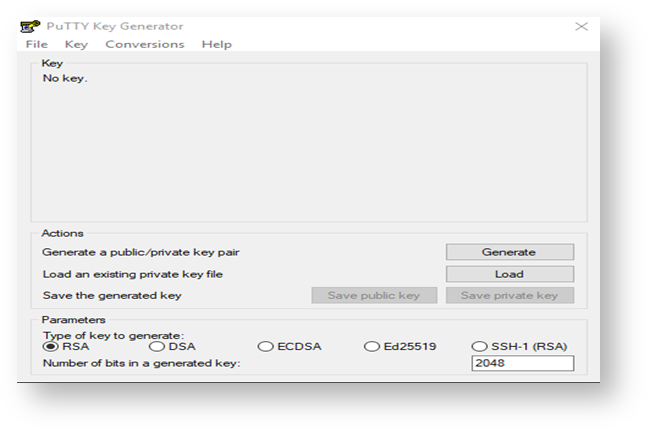
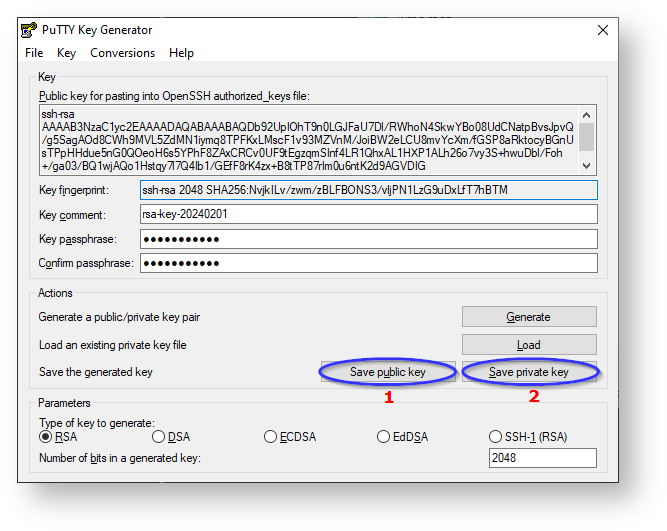
Generate Key Pair using the PuTTYGen application
...
In both cases the PuTTYGen usage is the same, it is used to create the authentication keys as explained below:
- Select “RSA” for the “Type of key to generate”, with 2048 bit key size or greater.
- Press the “Generate” button and follow the instructions on the screen.
...
| Note | ||
|---|---|---|
| ||
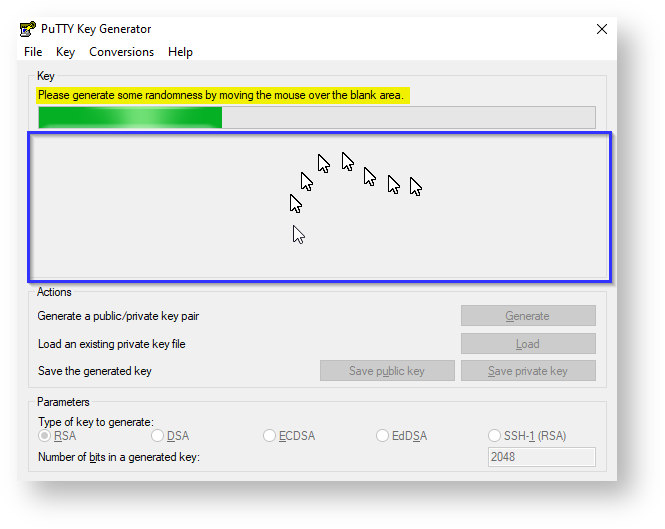
Please note that, as indicated, you will need to move the mouse cursor within the indicated area in order to complete de process:
|
- When the key generation is complete, the screen looks like below:

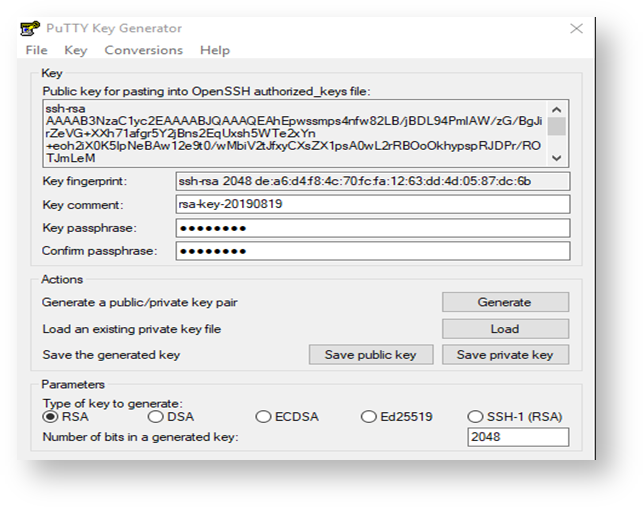
- Enter a strong passphrase and remember it. You will be prompted to type it when you use this key. The passphrase is never sent to the remote server.
Save the Key Pair
- Press the
...
- “Save public key” button to save your public key. Name it using the suggested account name, with the extension “.
...
- pub” (
...
- Example: ipob_jsmith.pub or ipob_cr.pub)
- Press the
...
- “Save private
...
- key” button to save your private key. Give it the same name but with “.ppk”extention (ipob_jsmith.ppk
...
Email your public key to you support contact copying the ipas mailbox (ipas@wipo.int).
| Warning |
|---|
| NEVER SEND THE PRIVATE KEY. Keep it safe. |
SSH-Keygen (Windows10, MacOS, Linux)
The native key pair generator ssh-keygen can now be used to create the authentication keys not only on Linux but also on MacOS and Microsoft Windows 10. The binary is installed by default with openssh package on Linux. On Windows 10 it is also part of the Operating System but should be enabled/installed first.
The key-generating procedure is simple and almost identical for each OS:
- Open Command Prompt window / Shell Terminal
- Type ssh-keygen and press Enter.
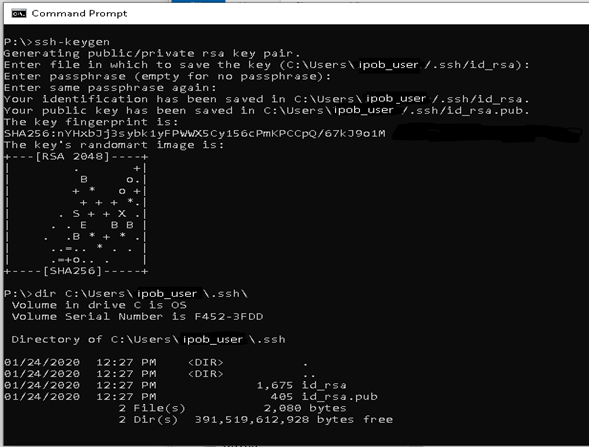
The key pair is generated and saved by default in <user’s home directory>/.ssh/ The default key names are:
- or ipob_cr.ppk)
| Warning |
|---|
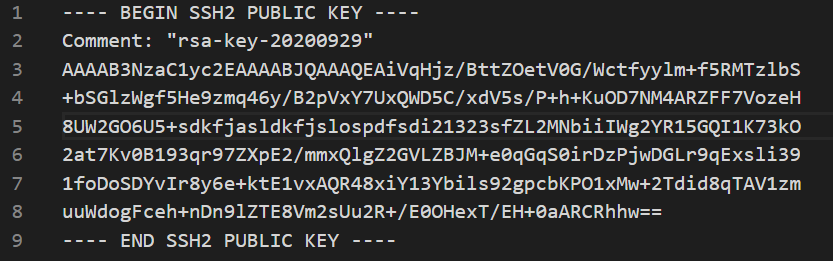
Be aware that the format of the key should only be RSA SSH2. If you view the public key with a text editor, will look like something like this:
Be aware that the sequence of characters will be different and unique (is random characters generated by the process described above). |
| Info |
id_rsa – Private Key id_rsa.pub – Public Key |
Delivery of the public key to WIPO
Rename the files using the suggested account namenaming convention.
| Info | ||
|---|---|---|
| ||
Example for individual:
Example for IPO (using country or organization two-letter code according to WIPO ST.3):
|
| Note |
|---|
Email your public key to |
...
your support contact copying the ipas mailbox (ipas@wipo.int).
|